
Kling 4.0 creative guide
Kling 4.0 Guide:
From Idea to Video
Build a clearer Kling 4.0 scene with purposeful references, a simple shot plan and a prompt that describes the action. This guide takes you through choosing inputs, directing keyframes, shaping dialogue and revising footage, with visual examples and two briefs you can adapt.
On this page
Start with the scene you want to finish
Plan the action, then add control. References define the subjects, keyframes define visual milestones, and the prompt explains how the scene moves between them. Judge the resulting sequence against the ending you need.
Define a visible outcome
A Kling 4.0 brief should describe an event that the viewer can follow from beginning to end. Before choosing references or writing a long prompt, decide what changes in the scene. A product turns into view, a visitor enters a room, a character passes a parcel, or a camera reveals a landscape. Write the ending as clearly as the opening.
Separate essential requirements from creative freedom. The product shape, the identity of a speaker and the direction of a handoff may be essential. Background decorations and minor weather details may be flexible. This distinction helps you evaluate a variation fairly: an attractive result is useful only if it preserves the details needed for the final edit.
Choose the right scale for a first attempt
Begin with one representative shot rather than an entire campaign. Select a moment that contains the main production challenge, such as a recognizable face during a turn or an object making contact with a hand. Keep the setting straightforward while testing that action. Once the essential event reads clearly, add secondary movement, another angle or more elaborate sound.
Decide where the clip will be used. A website background needs room for a headline and restrained movement. A social product video needs the object to remain readable in a narrow crop. A narrative insert needs an entrance and exit that connect with surrounding shots. Those requirements should influence framing before you choose the visual style.
Turn the goal into a usable ending. In the mug example, the final angle should show the handle and lid while leaving clear space for a title. In the parcel example, the shopkeeper should visibly own the parcel at the end. Choose that closing state before planning additional camera moves or decorative background activity.
Build a Kling 4.0 video in five steps
1. Choose how to describe the scene
Use text when the appearance and location can be interpreted freely. Use an image when the opening composition or subject needs a visual anchor. Use a reference set when identity, movement and setting come from different assets. For a revision, begin with the clip you want to change. Choose the input method around the problem you need to solve.
2. Organize the inputs
Collect the assets before drafting detailed timing. Assign each one a purpose: identity, product geometry, location, camera movement or voice. Remove conflicting versions of the same object and give the remaining files clear names. A smaller coherent set is easier to direct and inspect than a collection of attractive images that describe incompatible scenes.
3. Write the action and camera direction
Describe what happens in order, including the opening, the main change and the ending. Specify whether the camera moves, the subject moves, or both. Add light, pacing and sound after the action is clear. If several shots are necessary, describe the cut between them rather than combining contradictory camera directions into one sentence.
4. Set duration, framing and sound
Select a duration that leaves room for the action to complete. Plan a wide, square or vertical composition around the delivery format, and keep important contact points inside the usable area. Decide whether the scene needs speech, effects, ambience or music. Select the settings provided by the chosen generation mode separately from the written prompt.
5. Decide what the result needs next
Accept a take that completes the intended action, trim a usable portion, or identify a defect for correction. Use the troubleshooting table for examples of targeted revisions and the final delivery section for the complete review checklist. This separates creative approval from submission: completing a generation does not by itself mean the footage fits the edit.
Give Omni Reference assets different jobs
Identity and appearance
A face image should explain who appears in the shot. A product photograph should show the silhouette, construction and material that need to remain recognizable. Choose a useful angle with clear features, rather than an image whose subject is hidden by shadows or another object. If you add a second view, use it to clarify a detail the first view cannot show.
Motion and camera direction
A motion reference can communicate an action or camera path that is difficult to describe precisely. Distinguish the movement you want from incidental details in the clip. If the reference contains a different costume, product or room, say which aspect should carry over. Keep the identity reference authoritative when movement and appearance are supplied by separate assets.
Environment and visual style
A location reference should explain usable space, lighting and the relationship between the subject and background. A style reference can establish palette or atmosphere without defining a new character. Avoid mixing several incompatible light directions. When references disagree, identify which one governs the room and which only illustrates an aesthetic detail such as texture or color.
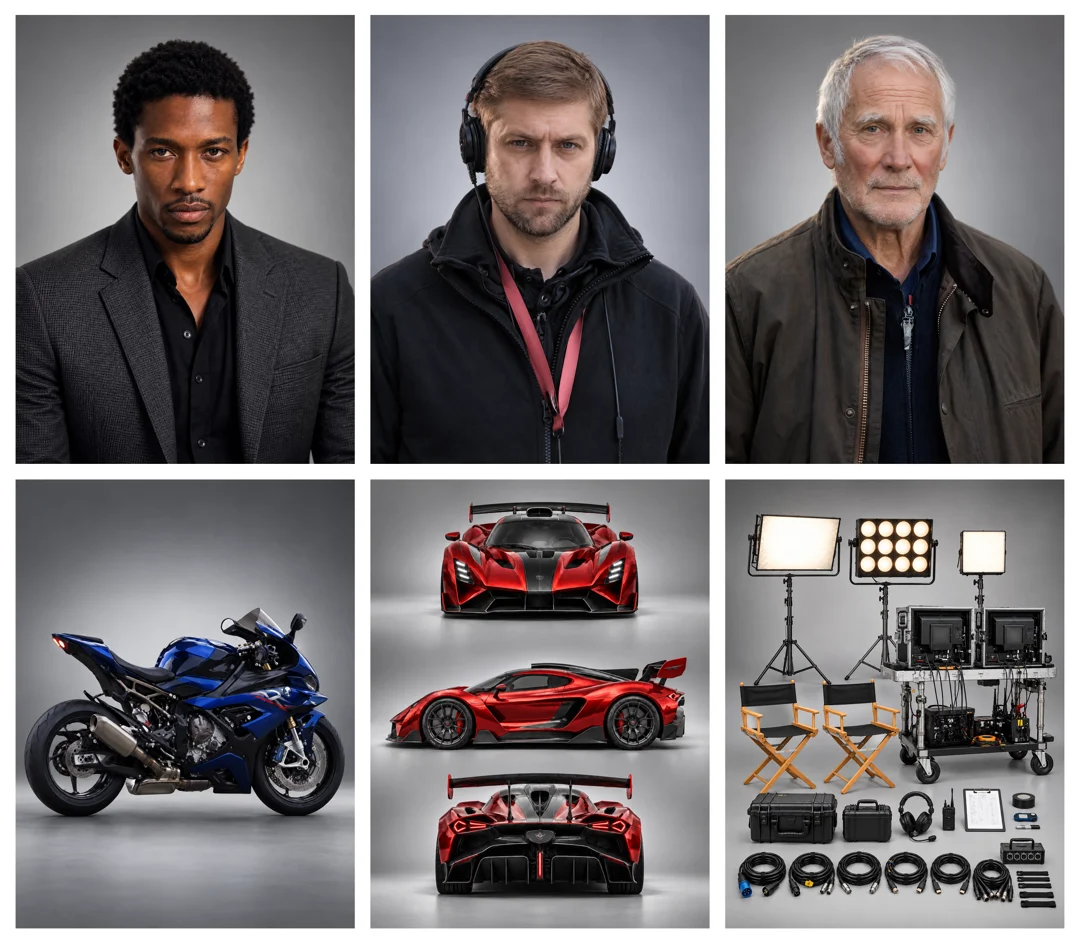
Use the reference sheet below to think about separate roles: people define a cast, vehicles define recognizable objects, and equipment describes the production setting. A sheet is an organizing aid, not an instruction to fill every reference slot. Specify which person acts, which vehicle moves and whether the equipment belongs in the frame or simply establishes context.
Inspect the product from the view needed for the action. A close-up of a lid does not explain a hidden handle, and an image of a closed box cannot establish its interior. Add another angle only when it answers that missing question. Keep the views consistent in construction and color so the extra asset clarifies the object instead of introducing another design.
Choose inputs around the task
| Creative goal | Input to consider | Prompt priority | Planning example |
|---|---|---|---|
| Invent a scene freely | Text brief | Describe the subject, visible action, location and camera path. | A quiet street scene can start from text when no specific face or building must match. |
| Preserve a person or product | Image reference | Name the appearance details to retain and the movement to introduce. | For the mug, use a view that clearly shows its handle, lid and silhouette. |
| Borrow movement or camera direction | Video reference | Specify whether to borrow the performance, camera path or pacing. | Borrow a camera arc without carrying over the reference clip’s costume or background. |
| Reach particular visual states | Keyframe guidance | Define the opening, important intermediate state and ending, then explain the transitions. | Plan a material close-up, a full product reveal and a closing composition in a compatible mode. |
Combine inputs when their roles complement each other. An image can define the mug while a video describes the camera arc; neither replaces a clear action brief. Select the corresponding controls in a compatible generation mode.
| Reference type | Planning limit |
|---|---|
| Images | Up to 10 |
| Videos | Up to 5, totaling 30 seconds |
| Subjects | Up to 7; up to 3 video-based subjects |
| Shared total | 15 assets across reference types |
Full-model reference limits share one total budget. They are not additive; choose the inputs supported by the generation mode you use.
Use keyframes to plan meaningful moments
References describe appearance; keyframes describe states
A reference tells the model what a person, product or place should resemble. A keyframe represents a composition the sequence should reach. Keep these purposes separate. The same product photograph might be useful as a reference throughout, while three different compositions describe its opening detail, full reveal and final hero view. The prompt supplies the movement connecting those states.
Start with a small set
Choose an opening, an important intermediate moment and a closing composition before adding more frames. For an interaction, the intermediate state might show both people holding the same parcel. For a reveal, it might show the object becoming fully visible. Add another frame when it resolves a real ambiguity, rather than because an unused slot remains.
Make the transitions physically plausible
Check that adjacent images belong to the same scene. The character should not change clothing without an intended cut, and a prop should not switch hands without a transfer. Leave time for a turn, reach or camera move. If connecting two states requires several unexplained events, insert a clear beat or divide the sequence into separate shots.
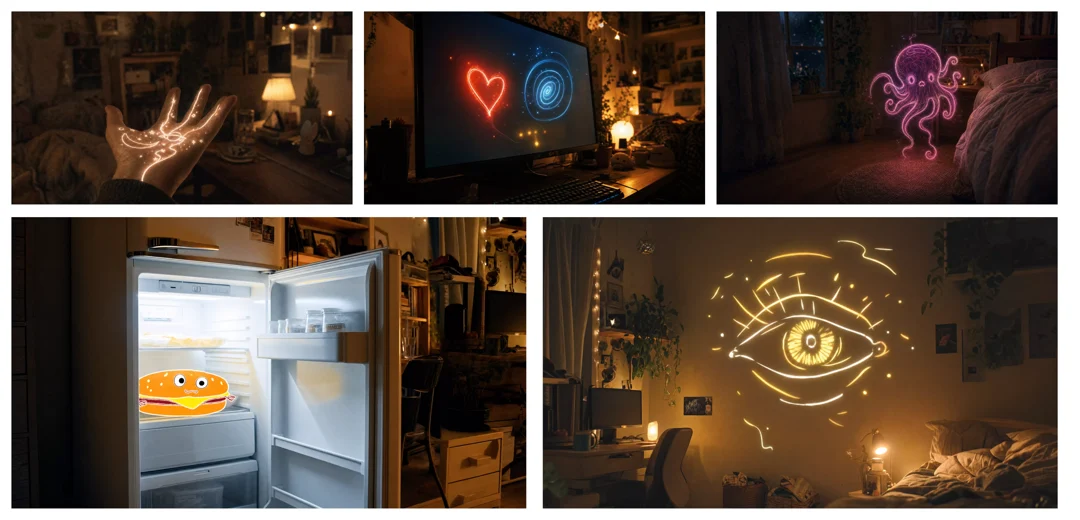
The keyframe plan below shows distinct visual ideas within one interior: a glowing hand, a screen, a luminous figure, a refrigerator and a wall projection. Read it as a sequence of visual milestones. When building your own version, identify which elements persist across the cuts and which appear only in a particular shot, then describe the transition explicitly.
Timing in a prompt is a plan to evaluate, not a frame-accurate guarantee. After generation, check when each state becomes readable and whether the action between them makes sense. A precise opening image cannot establish correct contact halfway through a shot. Replay the connecting movement and keep enough space around the event to trim the clip later.
The full-model keyframe workflow allows up to ten images. Begin with the few states your story needs, then add intermediate guidance where it resolves a difficult transition.
Write a shot brief instead of a caption
Describe the event before the aesthetic
Introduce the subject, its action and the setting in the first sentence. Then explain how the scene progresses. A statement such as “a courier offers one parcel to a shopkeeper” gives the clip a purpose. Add wardrobe, camera position and lighting to support that event. A list of cinematic adjectives cannot replace a clear description of what the viewer should see.
Keep subject names stable
Name each participant by a role and use that name consistently. The courier remains the courier, and the shopkeeper remains the shopkeeper. Explain who initiates a movement and what the other person does in response. When two people interact, specify the object involved and its final owner. This makes the sequence easier to understand and gives you useful acceptance checks.
Separate camera motion from performance
A camera orbit and a subject turn can produce similar changes in view but require different actions. Say which one you intend. For a product film, describe a stationary object and a moving camera if that is the brief. For a face close-up, decide whether the person looks toward the lens or the camera moves to reveal the expression.
Review the prompt for conflicting requests. A locked shot cannot also circle the subject. A tight portrait cannot show a complete full-body exchange. If both views are needed, write separate shots and describe the cut. Keep restrictions connected to the task, such as one parcel or an unchanged lid, instead of adding a long list of unrelated objects to exclude.
Treat the prompt as a production document you can revise. Keep the scene, action, camera, light and sound in distinct paragraphs when the brief is complex. Before submitting, read it as a viewer: does the event happen in a clear order, is the ending usable, and does every instruction help the scene? Remove repeated adjectives before adding more detail.
Choose between a continuous shot and a sequence
Direct a continuous shot
For an uninterrupted take, describe one camera path and make the important action possible within that view. A slow pullback can move from material detail to the whole product. A tracking shot can follow a character through a doorway. State that the shot continues without cuts, then keep the setting and performance consistent with the requested movement.
Use numbered shots when the view must change
A multi-shot scene needs a reason for each cut. A wide view establishes space, a close-up reveals an action, and a reaction communicates its meaning. Describe those shots in order and retain the same identifiers for recurring characters and props. Do not change several important visual details simply because the camera has moved to another angle.
Give each beat enough time
Allocate time according to what the audience must understand. A face can register an expression quickly, but a parcel transfer needs approach, contact, grip and release. Reserve a short closing hold when a title or transition follows. If the sequence feels rushed in the written plan, reduce its events rather than asking for faster movement throughout.
The product plan below assigns a different job to each time range. It shows how a continuous camera move can reveal material, shape and a closing composition without requiring a cut. When adapting it to another object, adjust the opening detail and final angle rather than simply replacing the product name. A bottle neck and a mug handle call for different viewpoints.
Longer clips are useful when the scene genuinely needs development. More time can also expose a weak action or repeat information. Decide what the extra seconds contribute: an entrance, a reaction, another meaningful viewpoint or a settled ending. If they only extend the same pose, a shorter result may be easier to place in the finished edit.
A ten-second product-shot plan
| Planned time | Visible event | Direction | Acceptance check |
|---|---|---|---|
| 0-4 seconds | Begin close to the lid, then pull back until the whole mug is visible. | The mug remains stationary; only the camera pulls back. | The same lid, handle and product silhouette remain recognizable. |
| 4-8 seconds | Move through a gentle camera arc around the revealed mug. | Keep the mug upright and the light direction consistent. | The camera changes the view without rotating or deforming the product. |
| 8-10 seconds | Hold a front three-quarter view with clear space on the right. | Let the camera settle and keep the closing composition steady. | There is a usable ending and room for a title added during finishing. |
This is a suggested shot plan for the mug prompt below, not an observed generation result. The time ranges express intended pacing; check the actual timing and transitions in the finished clip.
Direct dialogue, ambience and on-screen words
Write the line and name the speaker
For dialogue, separate the approved words from the performance instruction. Identify the speaker, language, delivery and point in the scene where the line belongs. Begin with a short line that fits the visible action. Specify whether another character listens silently or responds, and leave space for the response rather than overlapping several unrelated events.
Build sound around the location
Choose a few sounds that explain the scene: footsteps on stone, a quiet room tone, a lid touching the tabletop or traffic beyond a doorway. Decide whether music is needed and how it relates to speech. Avoid asking every sound to be prominent. The main action should remain understandable even when the clip is played at a modest volume.
Evaluate speech before synchronization
Listen once without watching the picture. Check the wording, pronunciation, voice and unwanted sounds. Then watch with sound and inspect mouth timing and event cues. A believable expression can distract from a wrong word, while appealing music can hide an incorrect contact sound. Treat these as separate approval steps rather than assuming that a polished image settles audio quality.
For visible text, state the exact wording, location and role in the composition. A shop sign, product label and closing title require different placement. Keep the phrase concise and specify which surface holds it. For approved branding or text that must be exact, retain the artwork and plan a controlled finishing step. Inspect every character rather than relying on the overall impression.
When adapting the same scene to another language, revise more than the sentence. Leave enough time for the translated line and check whether the expression still fits its delivery. Keep visual acceptance checks fixed so changes to the voice do not distract from an altered prop or identity. Review the final version after subtitles and captions have been added.
Two Kling 4.0 prompts to adapt
Use these original briefs to practice the workflow. Their settings are planning suggestions, and their text is separate from the illustrative video above. Copy a prompt, replace the subject with your own, and supply references and generation settings separately.
A product reveal with a clear ending
Keep one object recognizable while moving from a material detail to a useful final composition.
Prepare. Use a clean product photograph. If your chosen mode accepts several references, add a second angle only when it resolves a detail the first image cannot show. Use approved packaging artwork for any text that must be exact.
Plan. Suggested plan: 10 seconds, landscape framing. Choose the available output format in your editor; these are planning settings, not a recorded test.
A realistic studio product film featuring one matte charcoal travel mug with a brushed steel lid, placed on a dark stone tabletop. Keep the mug's shape, lid, handle and material consistent throughout. Soft window light comes from the left; the background is a plain charcoal wall.

Begin with a close view of the steel lid and the upper edge of the mug. Over the first four seconds, the camera slowly pulls back to reveal the whole mug. During the next four seconds, move through a gentle arc while the mug remains stationary and upright. End with a front three-quarter view and hold the final composition for two seconds, leaving clear space on the right for a title added in editing.

Use restrained room ambience, no dialogue and no music. Do not add hands, extra products, logos or generated text. Keep the tabletop, background and light direction unchanged.
What to check
- One mug remains visible with the same handle and lid.
- The camera moves while the product stays in place.
- The closing composition holds long enough to use in an edit.
A character interaction with one prop
Show a complete exchange without making the brief depend on several simultaneous actions.
Prepare. Choose a reference for the courier and a separate reference for the recipient if your mode supports them. Keep clothing and lighting compatible. Start without dialogue so the first review can focus on identity and the transfer.
Plan. Suggested plan: 12 seconds, landscape framing. Review contact in full playback; a good still does not establish a successful handoff.
A realistic twelve-second scene outside a small flower shop in soft morning light. A courier in a plain navy jacket carries one small brown paper parcel. The shopkeeper wears a cream shirt and a dark green apron. Keep both people, their clothing and the shop entrance consistent.

Start in a medium two-shot with the courier on the left and the shopkeeper beside the open doorway on the right. The courier offers the single parcel with both hands. The shopkeeper reaches forward, takes the same parcel, and holds it securely against the apron. The courier releases it only after the shopkeeper has a firm grip. They exchange a brief smile. End with the shopkeeper holding the parcel and the courier stepping back.

Use one steady camera position with a subtle forward drift. Include quiet street ambience and soft footsteps, without dialogue, music, captions or additional parcels. Keep the handoff fully visible.
What to check
- The same parcel moves from the courier to the shopkeeper.
- Hands make plausible contact without passing through the parcel.
- The ending makes ownership clear and preserves both identities.
Revise a take with a specific preservation brief
Name one change
An editing request should identify what changes and what stays. Instead of “make the scene better,” ask for a new wall color, a different background or a revised expression. Keep the primary clip as the reference for the performance you want to preserve. Add supporting assets only when they explain the requested replacement more clearly than text alone.
Describe what must survive the revision
List the subject identity, wardrobe, prop position, action order and camera movement that should remain stable. If the change affects lighting, think about shadows and reflections as well as the background. A wall replacement may also affect what appears on a reflective lid. Review those connected details rather than assessing the changed area in isolation.
Account for connected details
A background change can affect reflections, shadows and edges where the subject overlaps the room. For a polished mug, describe whether the new environment should appear on the lid. For a character, consider hair edges and objects passing in front of the body. These relationships make a replacement believable and should be part of the preservation brief.
A practical mug revision could read: “Replace the plain wall with a softly lit shop interior. Preserve the mug, tabletop, camera path, duration and light direction. Do not add people or text.” This is an original example of a preservation brief. It illustrates how to express intent, without claiming that an edited result will preserve every detail automatically.
Choose conventional finishing when it provides a more direct solution. A precise title, approved logo, shortened pause or final crop may not need another generated take. Compare the effort of a controlled adjustment with the uncertainty of recreating a performance. Keep added artwork separate from the footage so future language or format versions can reuse the accepted scene.
Find the cause before writing another prompt
Describe the symptom precisely
Choose the row below that most closely matches the visible problem. The suggested causes are hypotheses, not diagnoses of your clip. A rotating mug may follow an ambiguous movement instruction, while a changing face may reflect contradictory images. Locate the affected event first so the correction addresses a visible behavior instead of an overall impression.
Reduce competing actions
If none of the rows fits and the scene feels busy, identify the event that carries its meaning. A handoff may not need a crowd, dialogue and a camera orbit at the same time. Remove the least useful activity or split the sequence into separate shots, keeping the important contact and ending clear.
| Visible problem | Possible cause | Suggested revision | Acceptance check |
|---|---|---|---|
| The mug rotates during the camera arc | Subject movement and camera movement may be described ambiguously. | State that the mug stays fixed on the tabletop while only the camera moves. | The product holds its position and orientation while the viewpoint changes. |
| The parcel duplicates during the handoff | The object count or grip-and-release sequence may be unclear. | Specify one parcel. The shopkeeper grips it before the courier releases it; keep contact in frame. | The same parcel passes between the people and remains with the shopkeeper. |
| A person changes appearance between shots | Reference images may conflict, or the character’s description may change. | Use a consistent identity reference and role name. Resolve differences in clothing and accessories. | Face, wardrobe and relevant props remain recognizable across the transition. |
| The ending feels rushed | Too many events may compete for the available duration. | Remove an unnecessary action and reserve the final two seconds for a settled composition. | The main action completes before a clear closing hold. |
These are planning and troubleshooting examples, not recorded failures or verified fixes. A symptom can have several causes; use the suggested revision to test the explanation rather than assuming it guarantees a successful result.
Approve the clip in its final context
Review the whole take, then isolate a correction
Watch the entire take at normal speed, checking the action, identity, contact, camera path and ending. Listen to speech separately, then assess synchronization with the picture. Note the time of a defect and change one relevant input or instruction while preserving the original take. A successful still cannot establish that the connecting movement works.
Check the surrounding edit
Place the candidate clip beside the shots that precede and follow it. Compare movement direction, light, apparent scale and pacing. A strong standalone shot can still interrupt a sequence if it starts too late or ends before the action settles. Use the planned closing hold as an edit point, then check whether the transition communicates the intended story beat.
Inspect the delivery file
Confirm dimensions, aspect ratio and the selected output format. A label in the picture does not establish the file’s encoding or resolution. Watch again after cropping, grading and compression, using a display suited to the delivery. Preserve an original export so you can distinguish a generation issue from an artifact introduced while preparing the final version.
Test the composition at the size where people will see it. A product detail may disappear on a small phone screen, and a wide frame may lose the handoff when cropped vertically. Review with the actual captions and titles in place. If the important action is hidden by an overlay, adjust the finish or revisit the composition instead of only increasing resolution.
Archive the prompt, input filenames, selected settings, original output and finishing project together. Add a brief note explaining why the take was accepted and which compromises remain. This record makes another format or language version easier to prepare. It also helps you evaluate total production effort, including rejected attempts and cleanup, rather than judging the workflow by one attractive result.
Questions about your Kling 4.0 workflow
Where should I start?
Write a one-sentence goal and define the final frame. Choose a short first attempt with only the references needed to judge that goal. Check your editor’s selected model before submitting.
Do I need to use every reference slot?
No. Add an asset when it answers a specific question about identity, shape, movement or composition. Several conflicting references can make a brief harder to evaluate.
Can I paste these prompts straight into the editor?
Yes, as starting text. Choose duration and output settings separately, and supply your own references where supported. The workflow links on this page open the model pages; they do not preload the prompt or apply settings.
Have these example prompts been tested?
These are original planning examples for this guide. No videos were generated from them, and no success rate, timing or cost result is claimed. Adapt each brief to your own inputs and assess the resulting clip against its acceptance checks.
How do I fix a result that almost works?
Name one defect and the details that must remain stable. Change one input or instruction at a time, save the original take, and compare the revision against it. Use conventional editing when the change requires exact artwork or precise timing.
How should I compare two attempts?
Keep the brief, assets and settings fixed while changing one variable. Record the reason each take is accepted or rejected. Include retries and cleanup when deciding which approach saves work.
For observations of other supplied footage, explore the Kling 4.0 review. To consider two model generations for the same type of project, read the Kling 4.0 vs Kling 3.0 comparison.
Explore the Kling 4.0 workflow